When creating AI anime art, you have to choose models, write good prompts, and understand terms like LoRAs and checkpoints. But these details can make the process sound more complicated than it really is.
In fact, you don’t need to understand all of those things before you start. A platform like PixAI lets you choose an anime model, write a prompt in plain English, and start generating within minutes. There are also local AI anime generation platforms that let you do everything on your computer.
In this guide, I’ll break down what you actually need to create AI anime art. We’ll go from choosing where to generate and picking a model to writing prompts, adjusting the settings that matter, and refining your first character.
Choosing where to generate your anime art
Before choosing a model or worrying about prompts and settings, you need somewhere to run the generation. The options are using a cloud service that handles the technical side for you or running the AI generation process directly on your own computer.
Both approaches can produce anime artwork, but they put different parts of the process in your hands. Generally, you should view these in terms of how much setup, hardware, and technical control you want from the start.
Using a cloud-based AI image generator
With a cloud-based generator, the image is created on the service’s hardware rather than your own computer. You open PixAI in a browser or app, choose the resources you want to use, enter your prompt, and send the generation request to its servers.
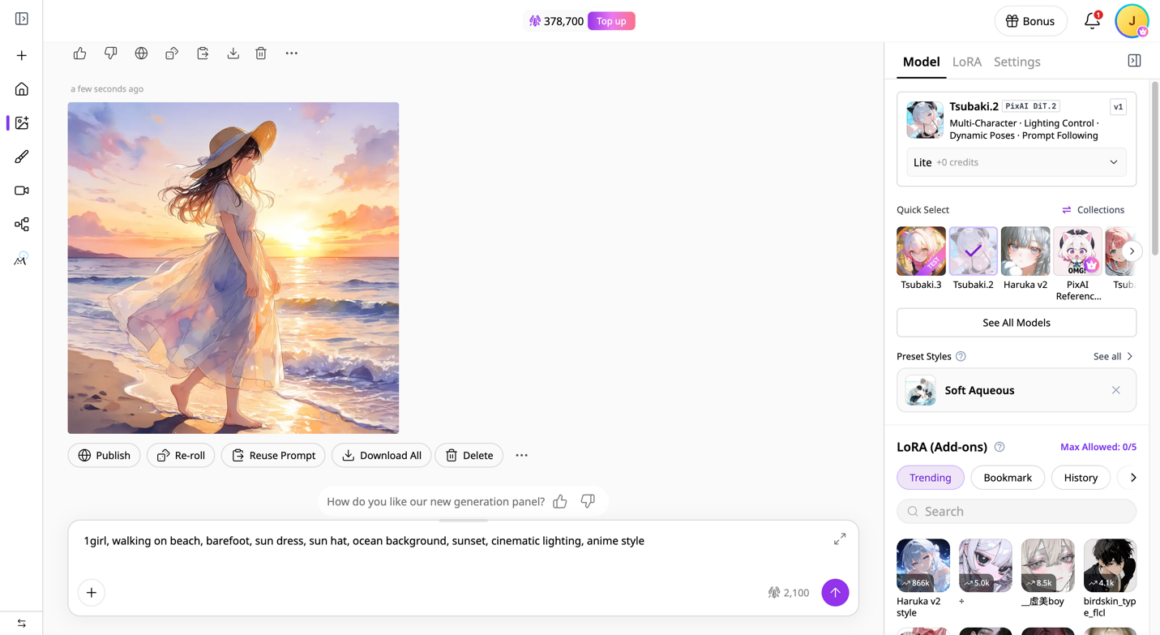
That means there is no need to install a local AI interface, download a 15 GB checkpoint, or make sure your computer has enough VRAM to run the model. The device you use mainly needs to access the service and display the result, while the demanding image-generation work happens remotely.
For a beginner, this removes much of the technical preparation between deciding to create an anime image and actually generating one.
Running AI image generation on your own computer
With local generation, the AI runs directly on your computer. Using Stable Diffusion, you install an interface such as Stable Diffusion WebUI Forge or AUTOMATIC1111, then download the model files you want to use and store them on your own drive.
A typical workflow to create AI anime art involves downloading a UI app, then checkpoint files in formats such as .safetensors, along with optional LoRAs and other components. Your computer’s GPU then handles the generation itself, so the model, image files, and processing all remain part of your local setup.
This gives you much more control over what you install and how the workflow is configured, but you also take on the work of managing the software, models, storage, and hardware.
Choosing an AI model for anime art
The model you choose has a major effect on the kind of image you get, even when the prompt stays the same. When you are a beginner, the useful question is less about finding the “best” model and more about finding one that matches the kind of anime artwork you want to create.
PixAI currently offers several anime-focused models with different strengths. Tsubaki.3 is its flagship DiT model and is designed for strong natural-language prompt understanding, while Haruka v2 is an SDXL-based model aimed at a more classic anime look and supports the wider SDXL LoRA ecosystem.
If you’re working locally with Stable Diffusion, you’ll make the same basic decision when choosing a checkpoint. The difference is that you download and manage the model yourself rather than selecting it from a cloud-based model library.
What are checkpoints and base models?
A checkpoint, or base model, is the main model that generates the image. It contains the learned visual information that the AI uses to interpret your prompt. This means that changing the checkpoint can change the character design and overall anime aesthetic even when the prompt stays the same.
For local Stable Diffusion, checkpoints are commonly distributed as .safetensors files and can take several gigabytes each. Mostly from around 1.5 GB to 20GB. You download the model and load it into your generation software.
With PixAI, the model is already hosted by the platform, so you only need to choose from the available models. You don’t have to download anything or manage the files yourself.
The main thing to understand here is that the model is the foundation of the image you get. Your prompt tells it what you want, but the model does the interpretation, and this varies significantly from one model to another.
What are LoRAs and when do you need one?
A LoRA is a smaller model add-on that works with a base model to push the generation toward a particular character, style, or other visual trait. Unlike a full checkpoint, a LoRA is designed to modify the base model rather than replace it.
For example, you might use a character LoRA to keep a particular OC’s appearance more consistent, or a style LoRA to give the artwork a particular visual appearance.
You can usually adjust its weight to control how strongly it affects the image. A starting point around 0.6–0.8 often works best, although the right value depends on the specific LoRA and model.
In PixAI, available LoRAs can be selected alongside the model you are using. You can also create and train your own LoRA by uploading around 15-20 images.
With local Stable Diffusion, you download the LoRA file and load it into the workflow yourself.
What hardware do you need?
The hardware you need depends mainly on where the image generation happens. Cloud generation shifts the demanding processing to remote servers, while local generation means your own computer needs enough GPU power and storage to run the models you choose.
If you’re using a cloud generator
When using a cloud AI image generator like PixAI, the demanding text and image processing happens on the platform’s servers. Your own device does not need a dedicated AI GPU. A regular laptop, tablet, or smartphone can be enough, provided it can run the app or browser and maintain a suitable internet connection.
This also means you are not limited by the VRAM available on your device when choosing a supported model or generating a larger image. The cloud handles the hardware side, while your device mainly handles the interface and displaying the results.
If you’re generating locally
When generating locally, your computer needs enough GPU memory to load the model and handle the generation settings you choose. Around 8GB of VRAM can be a starting point for less demanding workflows, but you need at least 16GB of VRAM to use larger models, higher resolutions, and upscaling.
Storage matters too. Checkpoint files can take several GBs each, while LoRAs and other supporting files add to the collection over time. A fast SSD with plenty of free space makes managing a growing local artwork library much more practical.
The exact requirements vary by model and workflow, so there is no single hardware specification that fits every local setup.
The basics of prompts
Once you have a model selected, you need to write a prompt to describe the image you want it to create. Anime-focused models often work well with short, structured tags, so you do not need to write a long paragraph to get started. However, platforms like PixAI also support generating images in natural language.
A simple anime prompt structure
A simple way to build an anime prompt is to move from the most important parts of the image to the supporting details. You can start with the character and their features, then describe the outfit, setting, lighting, and visual style.
For example:
1girl, solo, brown hair, ponytail, hazel eyes, white blouse, navy blue cardigan, classroom, sitting by window, golden hour sunlight, soft lighting
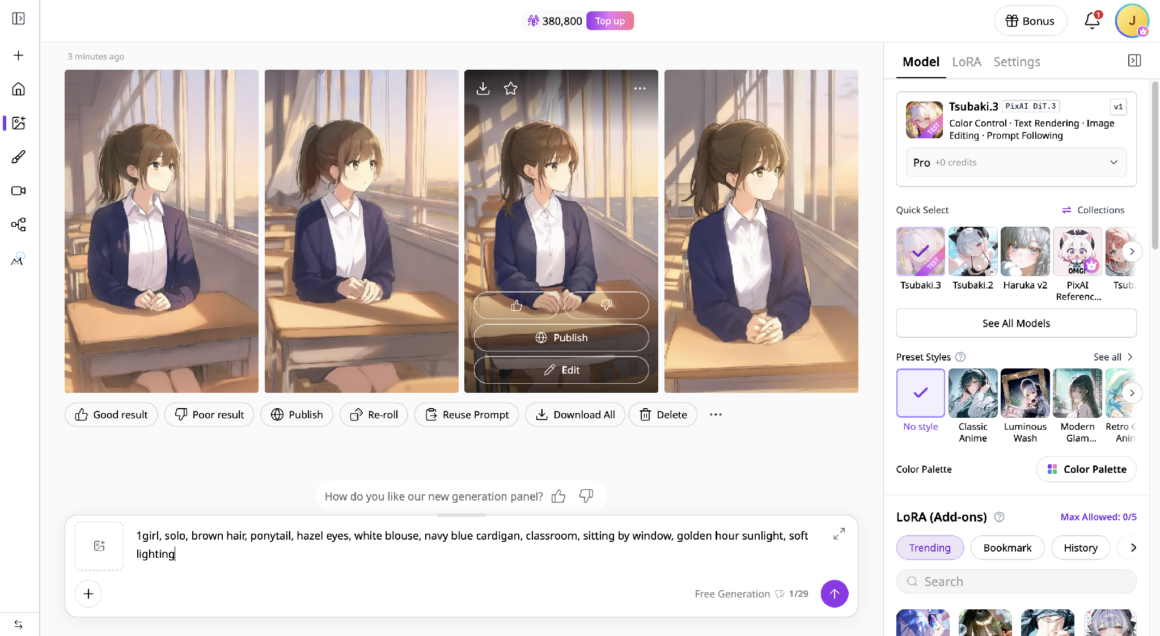
You can then add quality or style tags if they suit the model you are using. This tag-based approach is particularly useful with anime-focused models, although the exact terms that work best can vary between models. The important part is giving the AI enough information to understand who or what is in the image, what they are doing, and what you want the finished artwork to look like.
Negative prompts and when to use them
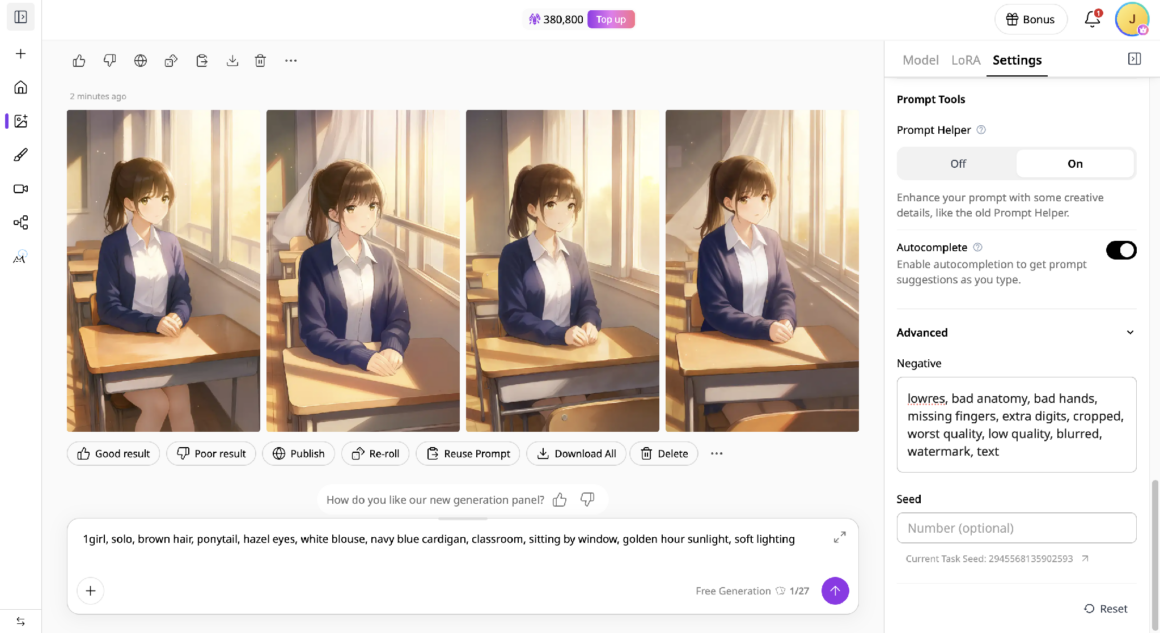
Negative prompts tell the model what you want to leave out of the image. They can be useful for common problems such as poor anatomy, extra fingers, unwanted text, watermarks, blurring, or awkward cropping.
A simple starting point for an anime workflow might look like:
lowres, bad anatomy, bad hands, missing fingers, extra digits, cropped, worst quality, low quality, blurred, watermark, text
Start with a short list and adjust it when you see a recurring problem rather than adding dozens of exclusions from the beginning.
Choosing the settings that fit your creative goal
Once the model and prompt are in place, a few settings can change how the image is generated. If you are a beginner, you only need to understand a handful of them at first. The rest can stay at their defaults until you have a specific reason to change them.
What beginners should change
Start with the settings that have an obvious effect on the finished image. Aspect ratio and resolution determine the shape and size of the artwork, so a portrait ratio such as 3:4 can work well for a single-character illustration.
You can also adjust the number of images generated at once when comparing variations. If you are using a LoRA, its weight is worth experimenting with too. A setting around 0.6–0.8 can be a useful starting point, but the right value depends on the particular LoRA and model.
For sampling steps, around 20–30 is a reasonable starting range for many workflows. More steps can take longer without necessarily producing a visibly better result, so there is little reason to push the number higher just because you can.
What you can leave alone for now
Some settings are useful once you start fine-tuning a workflow, but they do not need your attention on the first few generations. Sampler, CFG scale, and seed are good examples. You can usually leave the sampler at the model or platform default and keep CFG around its suggested value while you learn how the other controls affect your images.
The seed is especially useful later when you find a composition or character you want to revisit. Until then, leaving it random gives you more variation between generations.
Creating your first anime character
Once you have a model, prompt, and a few basic settings in place, you can move from experimenting with individual images to creating an actual character. The main aim should be generating a few possibilities, not getting the perfect result on the first attempt.
Choosing the model and style
The model and style you choose significantly affect how your artwork looks. For example, let’s apply a LoRA to the same prompt we used earlier.
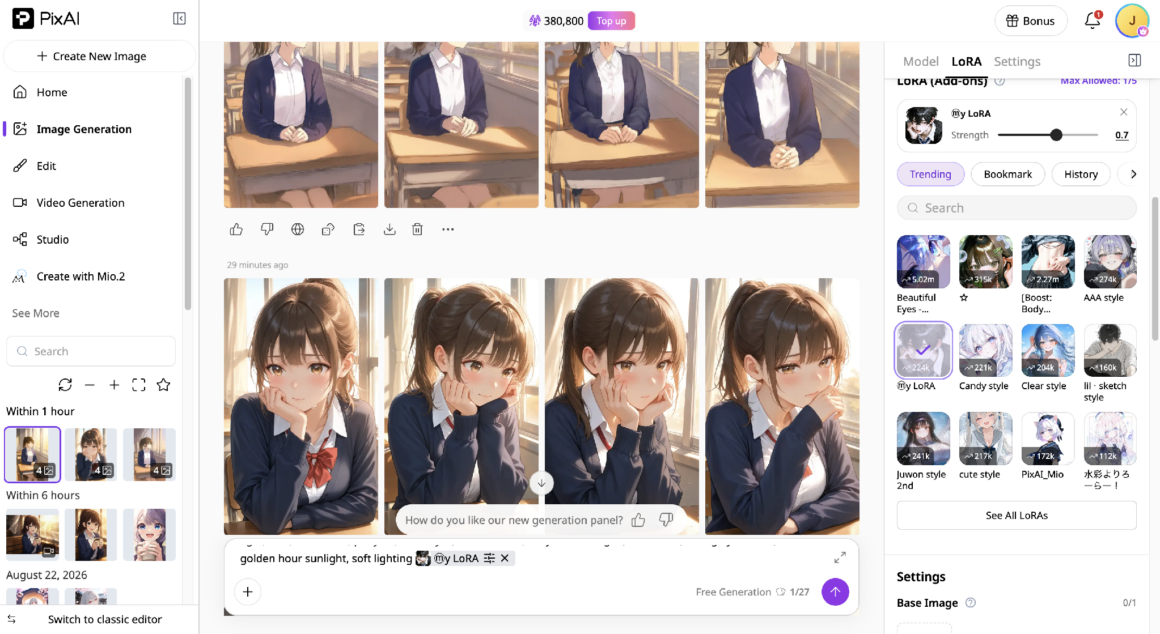
As you can see, the result is quite different and geared towards the style of the LoRA used.
As a beginner, the first thing you need to consider is the model, as platforms like PixAI offer a wide variety. Ideally, start with one of PixAI’s official anime models rather than immediately browsing through hundreds of community options. Tsubaki.2 or the newer Tsubaki.3 is a good starting point if you want stronger natural-language prompt understanding and more stylistic flexibility. Haruka v2 is another useful choice if you prefer a more traditional anime look and tag-based prompting.
The choice also affects what you can do later. Haruka v2 supports the broader SDXL LoRA ecosystem, while Tsubaki.2 and Tsubaki.3 use PixAI’s newer DiT architecture and are designed to handle more natural-language descriptions.
When you are a beginner, the important thing is to pick a model that fits the look you want, then spend some time learning how that particular model responds to prompts before adding more complexity.
Writing the first prompt
The first prompt does not need to capture every detail of the character. Start with the features that matter most to the design, then let the first few generations show you what needs more attention.
For example, if the character has brown hair, a distinctive outfit, and a particular personality, describe those clearly and leave room for the model to fill in less important details. Once you see the first results, you can add or change specific details instead of trying to predict everything in advance.
Refining the character
The first good generation is usually a starting point. If the character has the right overall look but something needs changing, you can refine that image instead of generating the whole thing again.
PixAI gives you a couple of ways to do this. You can describe a change with a prompt, such as asking for a different hairstyle or outfit. It will maintain most details and change the character based on your request.
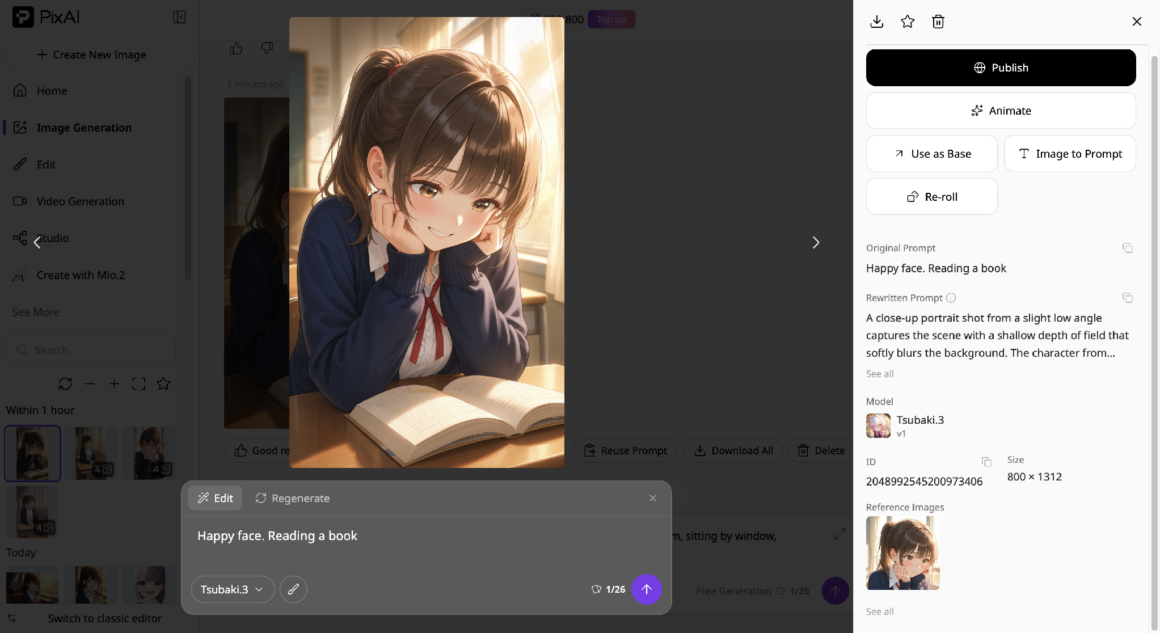
You can also use inpainting to select a specific part of the image and regenerate only that area. This is useful for smaller problems such as hands, eyes, clothing details, or other parts that need another pass.
The aim is to keep the parts of the image that already work, and focus your next generation on what still needs attention.
The workflow to create AI anime art matters more than the tools
You do not need a complicated setup to start creating AI anime art. A suitable model, a clear prompt, and some willingness to generate and refine are enough to get your first character on the screen.
From there, the workflow can grow with you. You might start with a base model in PixAI, try a LoRA when you want to introduce a specific character or style, then use inpainting to fix details or editing tools to develop the artwork further. The important part is to have a workflow that lets you spend more time creating and less time figuring out what you need before you can create AI anime art.